Outdoor Lighting for Villas, Palaces, and Luxury Apartments: Design, Distribution, Safety, and Cost
Why Has Outdoor Lighting Become an Essential Part of Villa Design?
Short answer: Good outdoor lighting is not about making a villa brighter. It is about improving the way architecture is perceived, guiding movement, supporting safety, highlighting the landscape, and maintaining visual comfort and privacy.
A building can look completely different after sunset.
A quiet façade during the day can become a clearly layered architectural composition at night, revealing materials, emphasizing entrances, defining circulation paths, and making outdoor spaces an integral part of the home's experience.
Achieving this result, however, does not depend on increasing the number of lighting fixtures.
In villas, palaces, and luxury apartments, we approach outdoor lighting as part of the architectural design from the early stages of the project—not as an item added at the end of construction.
We study the relationship between light and the façade, materials, landscape, entrances, windows, terraces, user movement, privacy, and safety requirements.
A carefully designed and expensive façade can lose part of its visual value when exposed to excessive or randomly distributed lighting.
Good lighting does not tell the viewer:
"Look how many lighting fixtures we have."
Instead, it makes the viewer see the building itself.
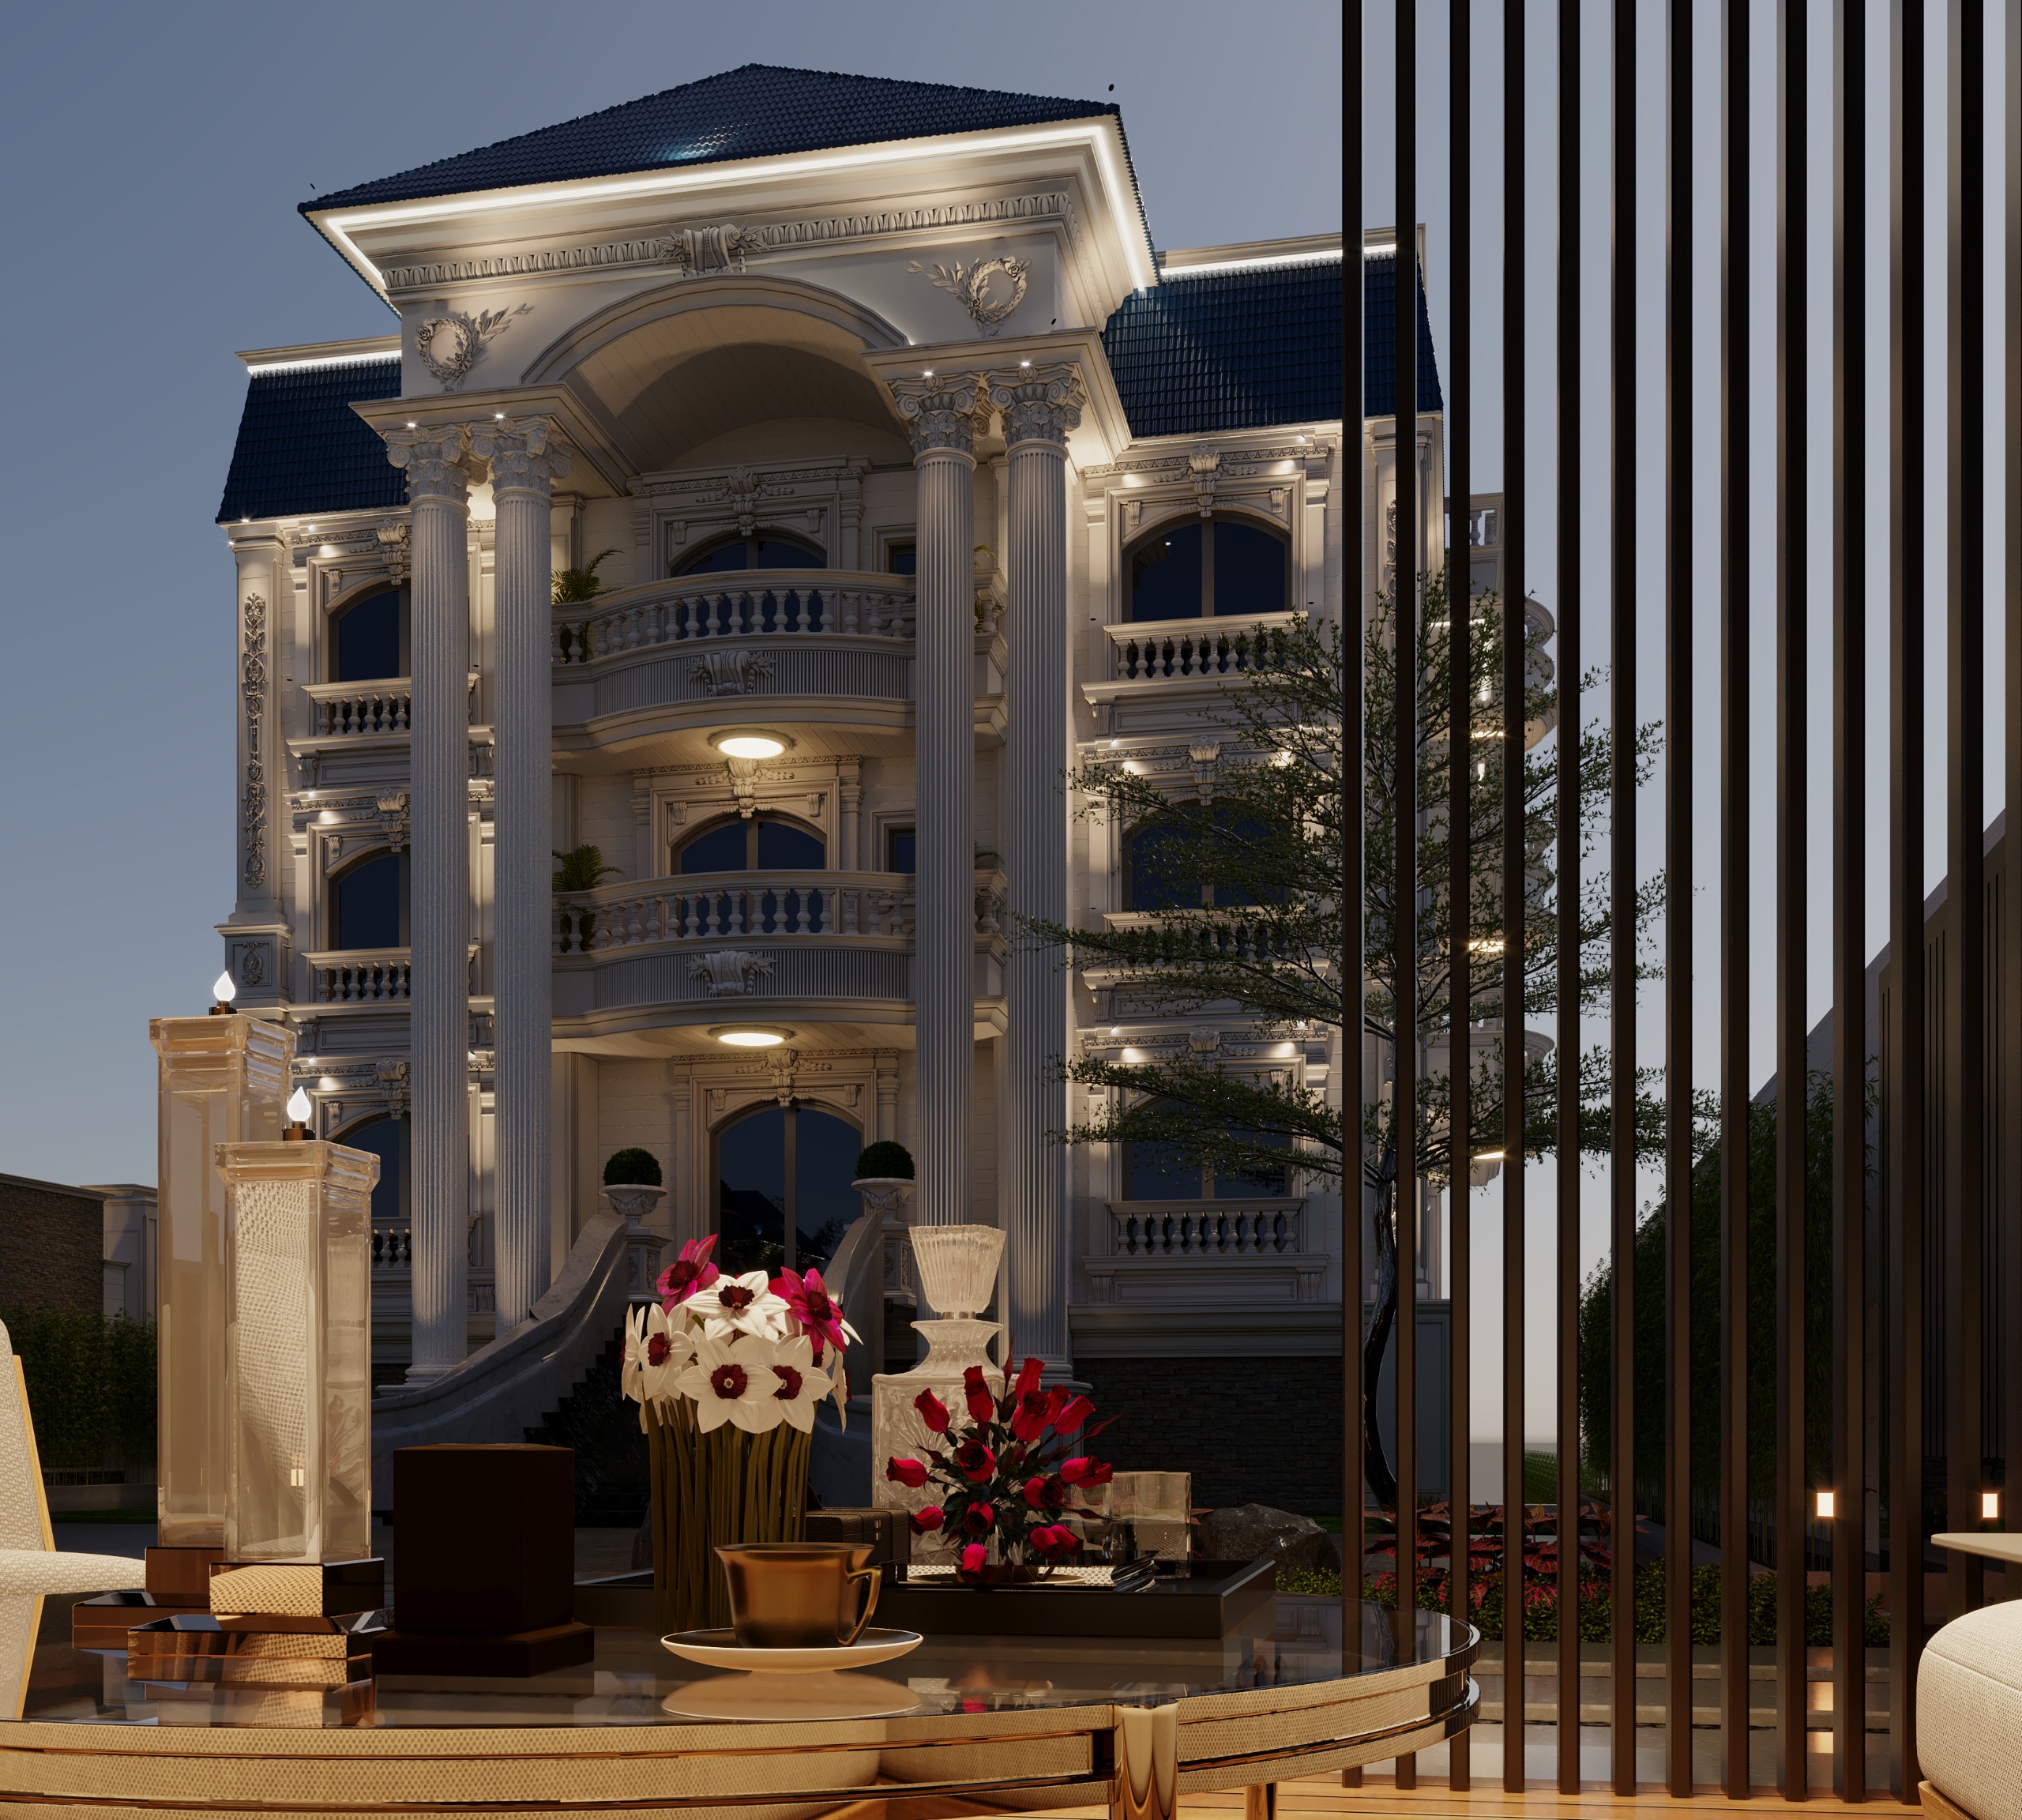
Luxury villa façade at night with calm architectural lighting highlighting materials and building massing.
Luxury villa façade at night with subtle architectural lighting highlighting materials and massing
Why Is Outdoor Lighting Important in Villa and Palace Design?
Outdoor lighting in a high-end residential project performs several functions at the same time: expressing architectural identity, improving visibility and circulation, supporting safety, guiding users, and enhancing the landscape.
The key is to prevent these functions from competing with one another.
When every part of a façade is illuminated with the same intensity, the differences between architectural elements can disappear.
When the elements that deserve attention are carefully selected and light intensity and direction are controlled, lighting can create a visual sequence that gives the façade greater depth and clarity.
For example, the entrance may become the Focal Point, while selected trees or architectural details act as secondary elements, with other parts of the site remaining at a lower lighting level.
In this way, lighting becomes a tool for composing the night-time scene rather than simply a method of illuminating the site.
Architectural, Security, Functional, and Landscape Lighting: What Is the Difference?
Each type of outdoor lighting has a different purpose, so the same fixture or lighting intensity should not automatically be used throughout the project.
| Lighting Type | Main Objective | Typical Applications | Design Approach |
|---|---|---|---|
| Architectural Lighting | Highlight the design | Columns, stone, masses, architectural details | Selective and controlled lighting |
| Security Lighting | Improve visibility and safety | Gates, entrances, paths | Clear distribution and suitable control |
| Functional Lighting | Support everyday use | Stairs, walkways, garages | Practical and comfortable illumination |
| Landscape Lighting | Enhance plants and the outdoor scene | Trees, shrubs, planting areas | Calm and controlled light levels |
| Path Lighting | Guide movement | Pedestrian paths | Low-level, well-distributed fixtures |
| Decorative Lighting | Support the visual identity | Decorative elements | Used selectively and with restraint |
Problems often begin when all these functions are treated as if they were the same.
How Should Outdoor Lighting Be Distributed Around a Villa?
Before selecting fixtures, the site should be divided into Lighting Zones so that the entire property is not treated as one surface requiring the same level of illumination.
Typical zones include:
-
Entrance Zone: Main entrance and arrival area.
-
Facade Zone: Façades and architectural elements.
-
Landscape Zone: Trees and planting.
-
Pool Zone: Pool and surrounding areas.
-
Terrace Zone: Terraces and outdoor seating areas.
-
Security Zone: Areas associated with circulation and security.
The next step is to establish visual priorities:
Focal Point → Secondary Element → Background
This means identifying the main element that should attract attention first, followed by supporting elements, while allowing other areas to remain visually quieter.
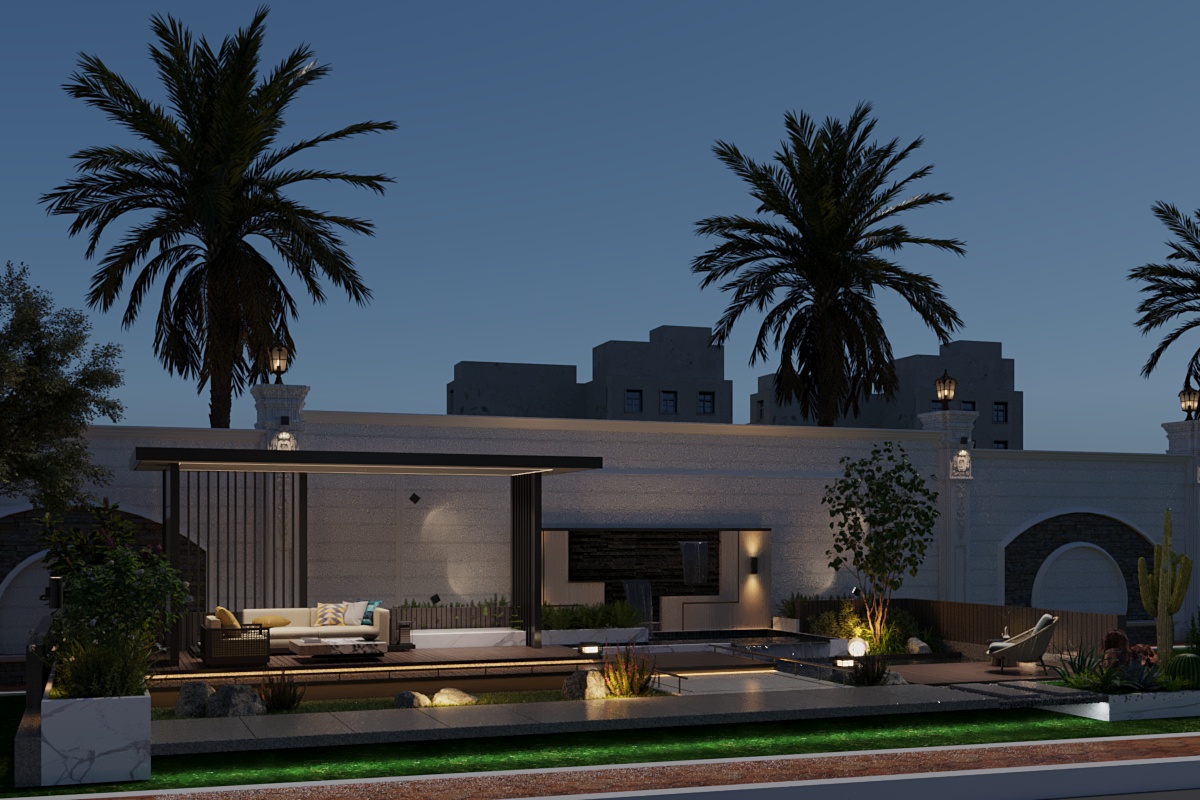
Outdoor lighting zones diagram showing the entrance, façade, landscape, pool, terrace, and security areas of a villa
Outdoor Lighting Selection by Location
The appropriate lighting solution depends on the function of the space, the element being highlighted, and how users experience it at night.
| Location | Primary Objective | Suitable Lighting | Key Design Consideration |
|---|---|---|---|
| Entrance | Welcome and safety | Downlight / Wall Light | Prevent glare and maintain visual comfort |
| Gate | Visibility and security | Directional Functional Lighting | Avoid glare toward the street |
| Façade | Highlight architectural mass and material | Wall Wash / Grazing / Uplighting | Select according to material and texture |
| Pathways | Safe movement | Path Light / Bollard | Fixture height and spacing |
| Garden | Shape the landscape scene | Accent / Uplighting | Avoid lighting every tree |
| Terrace | Comfort and seating | Concealed Light / Limited Downlighting | Keep light sources out of direct view |
| Pool | Visibility and atmosphere | Pool Lighting | Coordinate with the terrace and landscape |
| Garage | Use and safety | Functional Lighting | Clear movement and maneuvering |
This table shows that outdoor lighting should not be selected according to fixture type alone. The decision must consider the function of the space, the architectural or landscape element, and the way users see it at night.
A lighting solution suitable for a façade may not be appropriate for a pathway, just as tree lighting serves a different purpose from entrance lighting.
Each area should therefore be treated as a Lighting Zone with its own function, visual priority, and technical requirements.
What Is the Difference Between Wall Washing, Grazing, Uplighting, Downlighting, and Accent Lighting?
The choice of lighting technique should begin with the element we want to reveal, not simply with the name of the technique.
| Technique | How It Works | Best Application | Key Consideration |
|---|---|---|---|
| Wall Washing | Distributes light across a relatively broad surface | Walls and large architectural masses | May reduce the perception of texture |
| Grazing | Places the light close to the surface | Stone and textured materials | Can reveal surface imperfections |
| Uplighting | Directs light upward | Trees, columns, and vertical elements | Requires careful beam-angle control |
| Downlighting | Directs light downward | Paths, terraces, entrances, and circulation areas | Works well when the source can be concealed |
| Accent Lighting | Concentrates light on a specific element | Trees, architectural details, and landscape features | Used to establish focal points |
When studying a stone façade, fixture selection should not begin with the appearance of the fixture itself.
First, we determine whether the objective is to highlight the color of the stone, reveal its texture, or emphasize the architectural massing and depth.
A different objective can change the fixture position, mounting distance, height, beam angle, and light intensity.
This is one of the reasons lighting selection is an architectural decision rather than simply a product-selection decision.
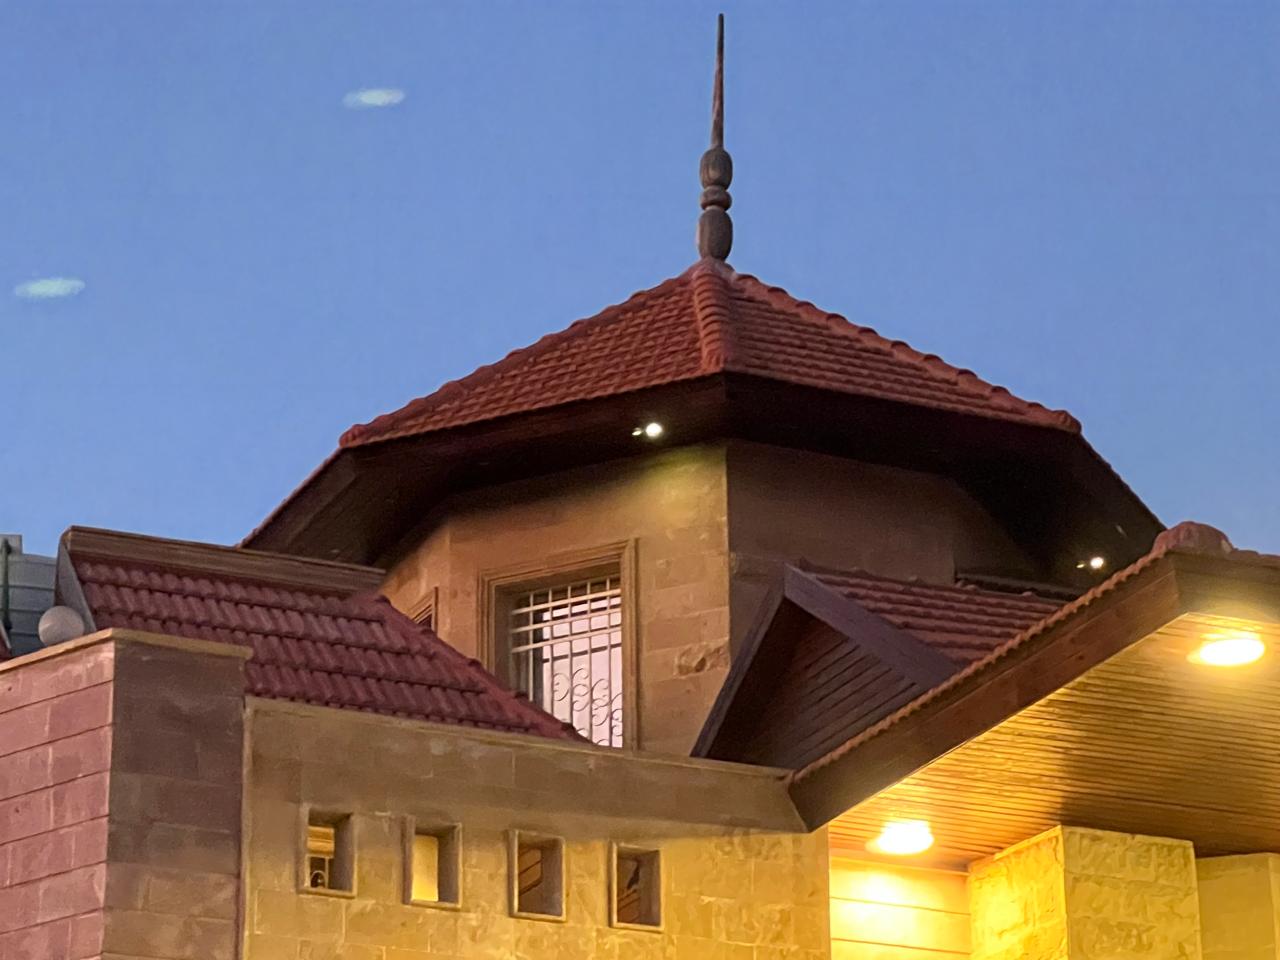
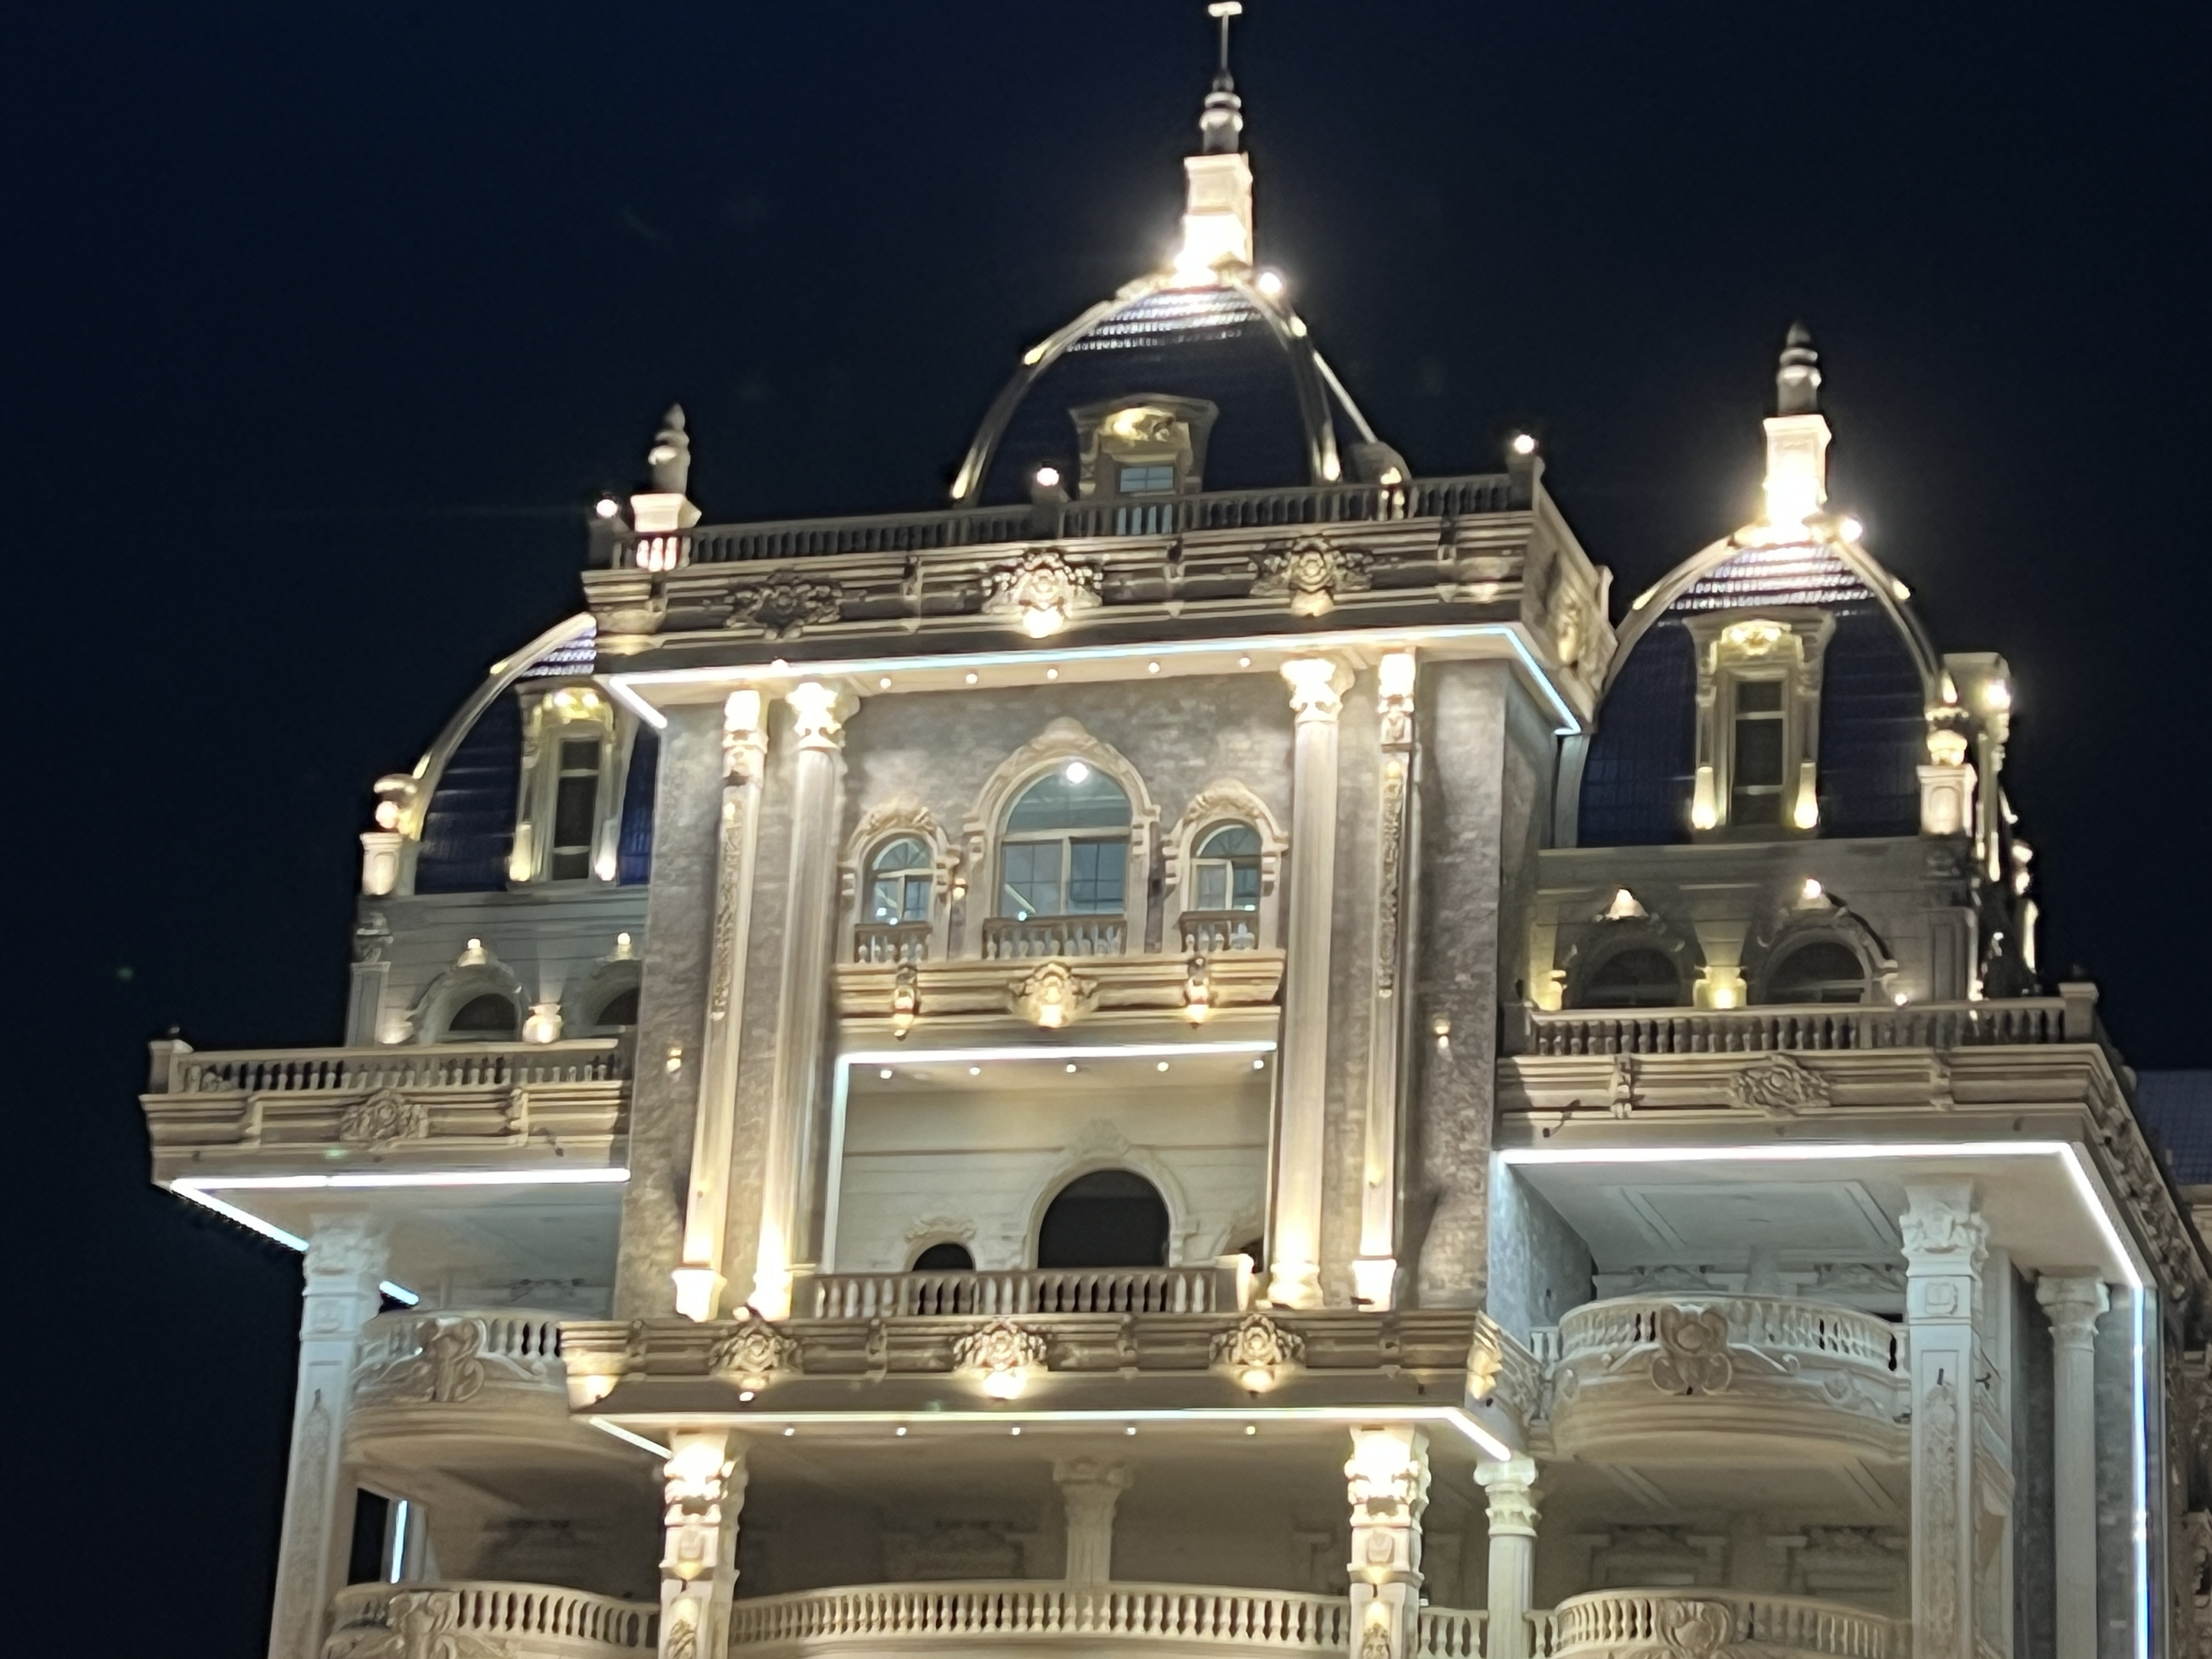
Directional lighting emphasizing the texture of a stone villa façade at night.
Directional outdoor lighting highlighting the texture of a stone villa façade at night
How Do We Choose the Color Temperature of Outdoor Lighting (CCT)?
CCT, or Correlated Color Temperature, describes the perceived color of a light source and is measured in Kelvin (K).
There is no single CCT that works for every villa, façade, or landscape.
| CCT | Visual Impression | Potential Applications |
|---|---|---|
| 2200K | Very warm, amber-like | Calm night scenes and selected landscape applications |
| 2700K | Warm and soft | High-end villas and residential façades |
| 3000K | Warm white | Façades, entrances, and outdoor areas |
| 4000K | More neutral and cooler | Specific applications requiring a cleaner or cooler appearance |
The number should never be selected independently of the material.
Natural stone, painted surfaces, wood, glass, metals, and plants do not respond to light in exactly the same way.
Therefore, the better question is not:
Is 3000K better?
The better question is:
Which color temperature makes this material and this space appear as intended without creating glare or distorting the visual character of the scene?
CCT may therefore vary between different areas of a project when the design requires it, provided that the overall night-time composition remains visually coherent.
Why Can Strong White Lighting Be a Mistake in a Luxury Villa?
Because luxury does not mean maximum brightness.
Very cool or excessively bright lighting can make some materials appear harsh, increase contrast, and draw attention to the light source instead of the architectural element.
Excessive illumination can also affect visual comfort, privacy, and the surrounding night-time environment.
The assumption that:
"Brighter white light means a more luxurious appearance"
is therefore not necessarily correct.
In many situations, the opposite can be true.
What Is IP Rating and Why Does It Matter in Outdoor Lighting?
Outdoor fixture selection depends not only on appearance and output, but also on the level of protection required at the installation location.
Common IP classifications that may appear in outdoor lighting products include:
| Rating | General Application |
|---|---|
| IP44 | Relatively protected outdoor locations |
| IP65 | Outdoor applications exposed to dust and water |
| IP66 | Applications requiring a higher level of protection against water |
| IP67 | Applications requiring a higher level of protection and, depending on the product and conditions, temporary immersion protection |
A higher number does not automatically mean that the fixture is the best choice for every location.
A fixture installed beneath a canopy is exposed to different conditions from one directly exposed to rain, spray, or persistent moisture.
The design should also consider:
-
Junction boxes.
-
Cable routes.
-
Maintenance access.
-
Water drainage.
-
Connection protection.
-
Installation quality.
-
Manufacturer requirements.
Even a high-quality fixture can fail if the surrounding installation is poorly executed.
How Should Lighting Be Integrated with Architecture and Landscape?
Outdoor lighting should not create three separate scenes for the façade, garden, and pool.
Instead, we look at the relationship:
Building → Terrace → Landscape → Pathways → Pool
The landscape is part of the architectural composition.
For example, low-level lighting can be used along pedestrian paths, softer lighting can define planting areas, and a selected landscape element can become a focal point.
In projects with a pool, the relationship between the pool, terrace, façade, and movement through the outdoor spaces should also be considered.
If the pool is a major visual element from the living room, its lighting should help transform the view into a natural extension of the architectural experience.
This is why architectural design, landscape design, and outdoor lighting should be developed as one connected visual system.
How Does Outdoor Lighting Affect Privacy?
Poorly planned lighting can compromise privacy.
When everything is illuminated too strongly, interior spaces can become more visible from outside, particularly when large windows face a garden or street.
We therefore study the relationship between:
-
Windows.
-
Terraces.
-
Neighbors.
-
Property boundaries.
-
Trees.
-
Fences and walls.
-
Light sources.
Privacy in exterior design does not depend only on walls and boundaries.
Light itself can create or compromise privacy.
How Can We Balance Lighting Beauty and Home Security?
Good security lighting does not mean installing powerful floodlights in every direction.
Security begins by identifying areas where users need clear visibility, such as:
-
Main entrance.
-
Gate.
-
Pedestrian paths.
-
Stairs.
-
Walkways.
-
Parking areas.
-
Transitions between indoor and outdoor spaces.
-
Sensitive areas around the property boundary.
The appropriate lighting solution is then selected for each function.
Increasing illumination everywhere is not necessarily better for security. Glare and uncontrolled light spill can reduce visual comfort and visibility.
Lighting can therefore be divided into circuits and scenes, with timers, sensors, and dimming used when appropriate.
Smart Outdoor Lighting for Villas
Smart outdoor lighting can make an exterior lighting system more flexible without turning the entire project into a full Smart Home system.
The basic idea is to connect Lighting Zones in a way that allows them to be switched, dimmed, or adjusted according to time and use.
Potential functions include:
-
Timers: Schedule specific lighting zones.
-
Motion Sensors: Activate functional lighting when movement is detected.
-
Dimming: Reduce or increase light levels according to time and use.
-
Lighting Scenes: Create different lighting scenarios for different activities.
-
Central Control: Manage multiple zones from a central point.
-
Smart Home Integration: Connect outdoor lighting to the project's smart system when appropriate.
Arrival Scene
Gate → Path → Entrance
Gate, pathway, and entrance lighting can operate together to provide clear visibility and a coordinated arrival experience.
Evening Scene
Terrace → Landscape → Pool
Terrace, planting, and pool lighting can operate at carefully controlled levels to create a comfortable evening atmosphere without relying on maximum brightness.
Night Scene
Essential Security Lighting
Essential security lighting remains active while selected decorative elements are dimmed or switched off when they are no longer necessary.
The objective is not to add technology simply because it is available, but to use it when it adds real value to flexibility, energy management, and user experience.
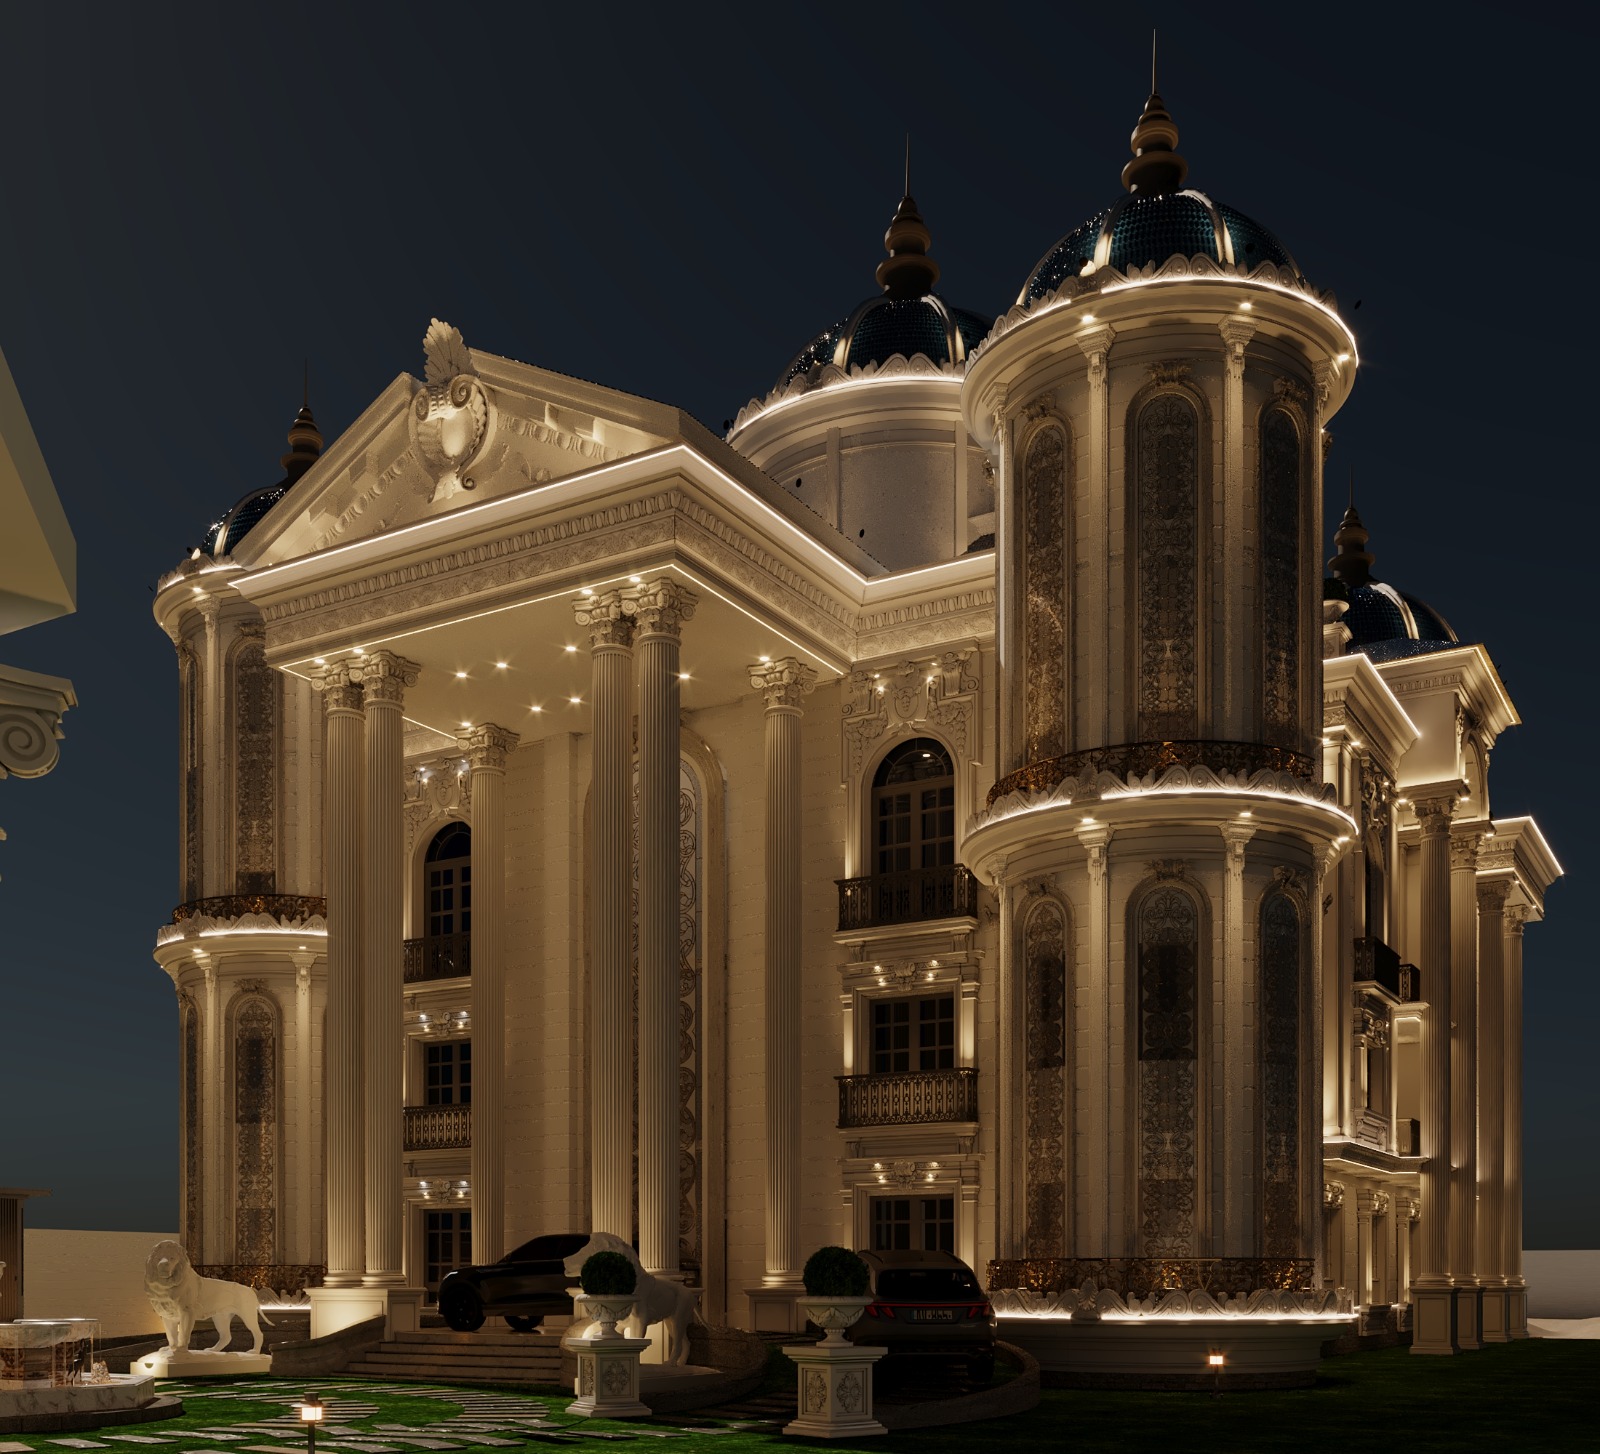
Outdoor Lighting at Saba Palace
In one of our projects, Saba Palace, the challenge was not simply to add lighting fixtures.
The project was approached as part of a broader architectural transformation, where the façades, roof, architectural elements, and outdoor lighting were reconsidered as an integrated composition.
The Challenge
The objective was to treat the building as a complete architectural composition rather than adding separate lighting fixtures to an existing façade.
The Reason
When the façade itself requires a renewed architectural identity, lighting should emerge from the architectural language rather than being applied as a separate visual layer.
The Intervention
The project included:
-
A comprehensive redesign of the façades.
-
The design of a new roof.
-
The addition of architectural elements.
-
The integration of outdoor lighting with the new architectural composition.
-
Coordinating the façade and its surrounding elements within a unified design vision.
The Result
The goal of this approach was to create a more integrated and refined architectural composition, allowing the lighting to work with the façade and architectural elements rather than compete with them.
Key Takeaway
When the architecture itself requires reorganization, outdoor lighting should not be treated as an independent decorative solution.
Instead, the following elements should be considered as one integrated system:
Architecture + Façade + Roof + Landscape + Lighting
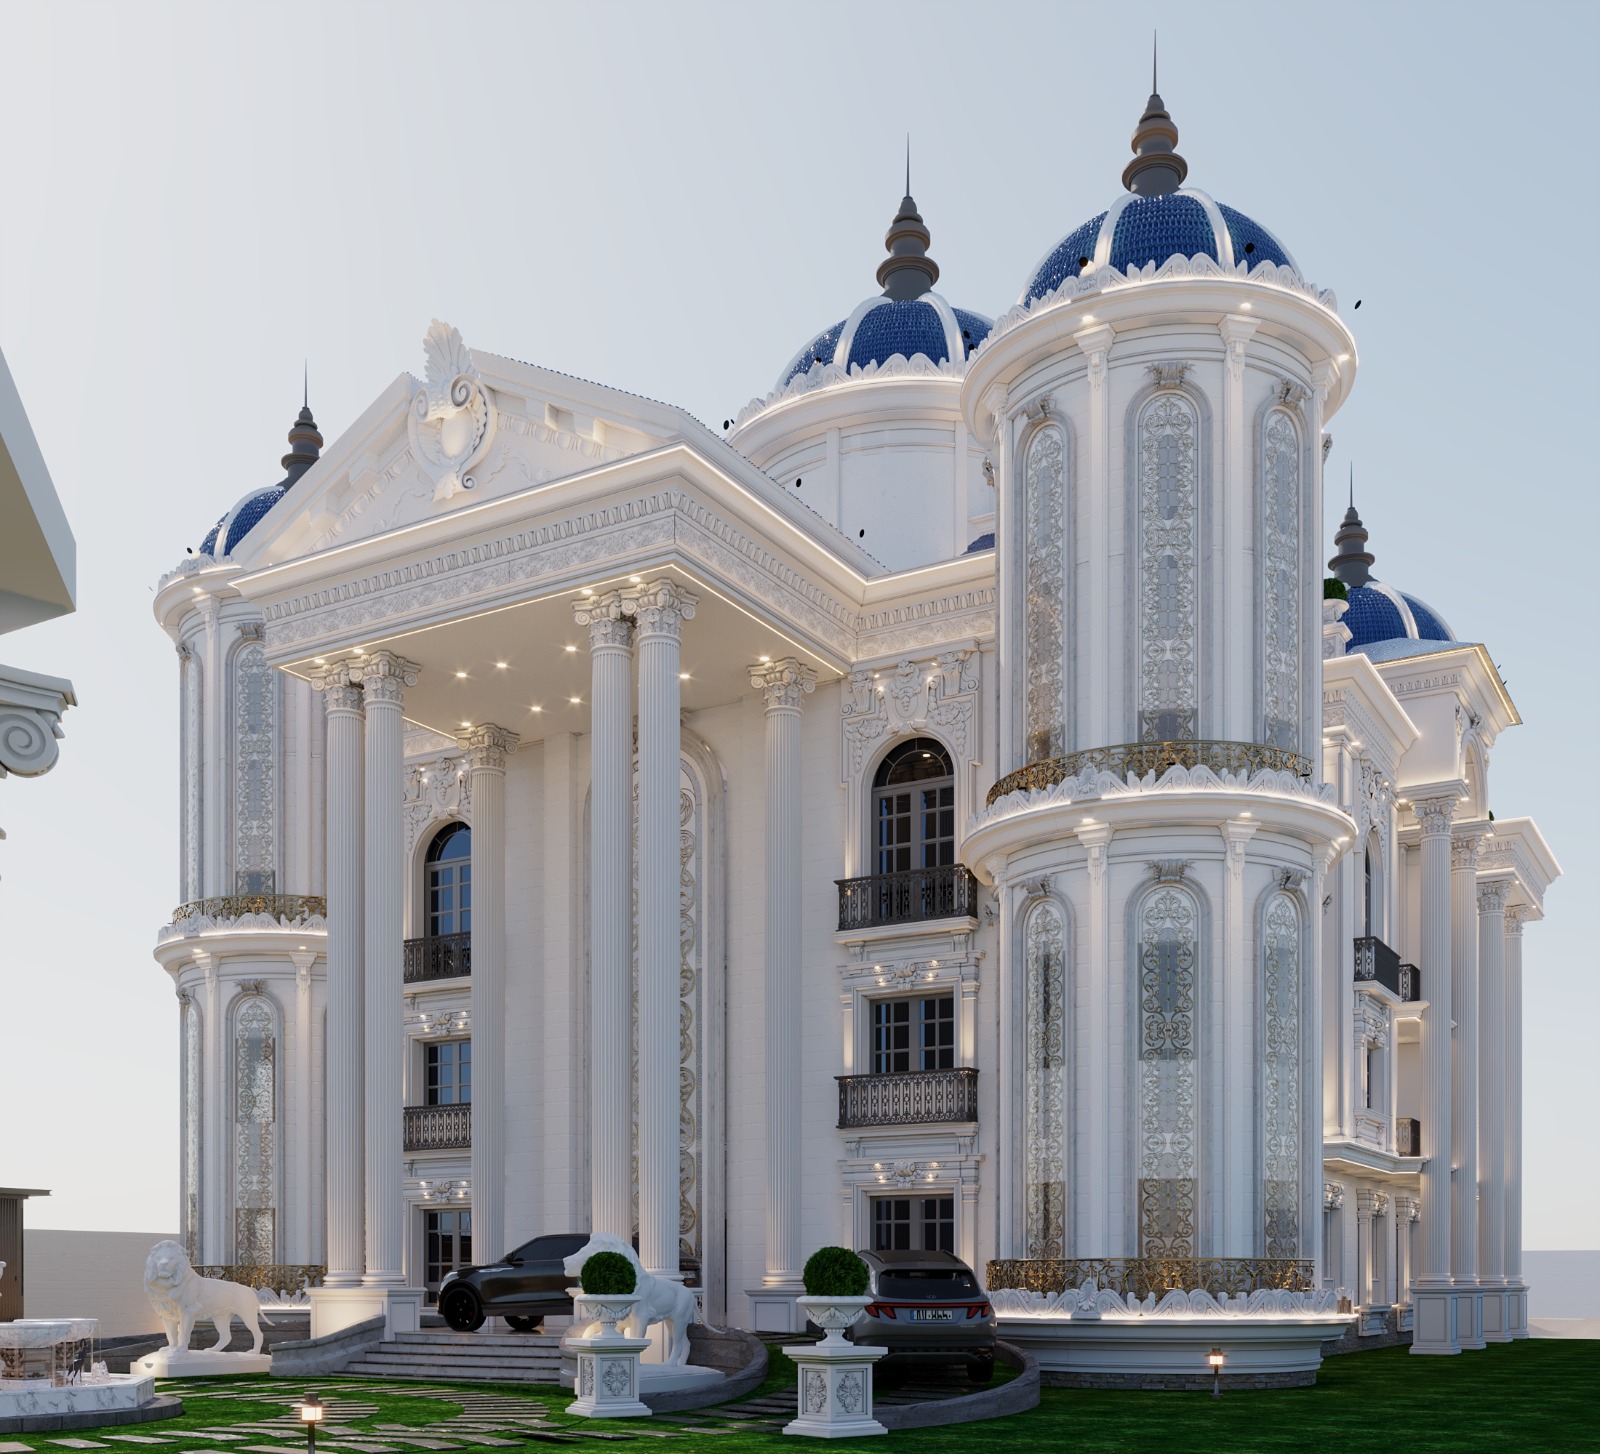 Saba Palace façade with an integrated architectural composition and outdoor lighting]
The Outdoor Lighting Design Workflow: From Site Study to Night-Time Testing
A successful outdoor lighting system does not begin with purchasing fixtures.
It begins with understanding the project.
1. Site Study
The process starts by understanding the site and its surroundings rather than looking only at the building footprint.
The study includes:
-
View directions.
-
Main and secondary entrances.
-
Surrounding streets.
-
Neighboring properties.
-
Existing and proposed trees.
-
Pool location.
-
Terrace and outdoor seating areas.
-
Vehicle movement and parking.
-
Pedestrian circulation.
-
Areas requiring functional lighting.
-
Architectural elements that deserve to be highlighted at night.
This stage can reveal relationships that may not be obvious when looking at the façade alone, such as reflections on glass, light spill toward neighbors, or direct visibility of a light source from an outdoor seating area.
2. Architectural and Façade Study
The building masses, architectural details, materials, and elements worth emphasizing at night are identified.
3. Define Lighting Zones
The project is divided into functional and visual lighting zones.
Typical zones include:
-
Entrance Zone.
-
Facade Zone.
-
Landscape Zone.
-
Pool Zone.
-
Terrace Zone.
-
Security Zone.
4. Establish Visual Priorities
The project is organized according to:
Focal Point → Secondary Elements → Background
Not every element should compete for attention.
The focal point receives the strongest visual emphasis, secondary elements support it, and background areas remain quieter.
5. Select the Lighting Technique
Depending on the target element, the design may use:
-
Wall Washing.
-
Grazing.
-
Uplighting.
-
Downlighting.
-
Accent Lighting.
-
Concealed Lighting.
The decision depends on what we want users to see and how we want them to see it.
6. Select CCT
Color temperature is selected according to the material, function, and overall night-time composition.
Common values include:
-
2200K: Very warm, suitable for calm scenes and selected applications.
-
2700K: Warm and comfortable, often appropriate for high-end residential projects.
-
3000K: A balanced option between warmth and clarity.
-
4000K: More neutral and cooler, suitable for specific functional applications.
The selected CCT should be coordinated with façade colors, materials, glass, landscape, and the intended night-time atmosphere.
7. Determine Light Intensity and Beam Angle
Once the lighting technique and CCT are selected, the next step is controlling Intensity + Beam Angle.
Higher intensity does not necessarily improve the result.
Excessive light can cause:
-
Glare.
-
Loss of visual hierarchy.
-
Distortion of material appearance.
-
User discomfort.
-
Unwanted illumination.
-
Light spill toward neighbors or streets.
Intensity and beam angle should therefore respond to the size of the element, distance, material, and viewing position rather than the assumption that more light is always better.
8. Electrical Coordination
Lighting design does not end with fixture selection.
The system must be coordinated with:
-
Power supply points.
-
Cable routes.
-
Control locations.
-
Lighting circuits.
-
Lighting Zones.
-
Appropriate protection.
-
Outdoor installation requirements.
-
Maintenance access.
On larger projects, early coordination between architecture, electrical design, and landscape is essential to avoid forced solutions during construction.
9. Coordination with Landscape and Finishes
Lighting must be coordinated before construction so that fixtures, cables, and technical solutions do not become visually intrusive after the landscape and finishing works are completed.
10. Execution
Once the design, specifications, and required drawings are approved, the fixtures can be installed.
During execution, the team should verify:
-
Actual fixture positions.
-
Uplight and wall-wash directions.
-
Installation heights.
-
Concealment of light sources that should not be directly visible.
-
Connection and protection quality.
-
Compliance with the approved design.
The difference between a good design and a good executed result can come down to very small details. A minor change in fixture location or angle can completely alter the night-time appearance.
11. Night-Time Testing
This is one of the most important stages of the process.
Outdoor lighting cannot be fully evaluated through drawings or 3D renders alone.
Once the system is operating at night, the project should be reviewed from different viewpoints and circulation positions.
The review should consider:
-
Light distribution.
-
Illumination levels.
-
Beam direction.
-
Glare.
-
Balance between façade and landscape.
-
Entrance and pathway visibility.
-
Unwanted visibility of fixtures.
-
Impact on windows, neighbors, and streets.
-
Relationship between focal points and secondary elements.
Fixtures may need to be redirected, dimmed, or repositioned to achieve the intended result.
From Site Study to Execution: The Overall Method
In professional projects, outdoor lighting should not be treated as an item added at the end.
The process begins with Site Study, moves through architectural design and Lighting Zones, continues with technology and specification selection, then proceeds to the required drawings and coordination, and finally reaches Execution and Night-Time Testing.
This sequence is particularly important in villas and palaces because outdoor lighting interacts with façades, landscapes, entrances, pools, terraces, circulation, and electrical systems at the same time.
The final result should not simply be a building that is illuminated.
It should be a complete night-time environment designed and tested as part of the architecture itself.
How Does El Helw Architects Approach Outdoor Lighting Design?
Outdoor lighting design does not begin with choosing the shape of a fixture.
It begins with understanding what we want the user to see at night and how that element should appear within the complete architectural scene.
When studying a stone façade, for example, the first question is not:
Which fixture should we use?
Instead, we ask:
What is the visual objective of lighting the stone?
Is the objective to highlight its color?
To reveal its texture and surface details?
Or to emphasize the architectural massing and depth between different façade elements?
The answer changes the design decision.
It may change the fixture location, distance from the façade, mounting height, direction, beam angle, and light intensity.
If the objective is to reveal the texture of rough stone, Grazing may be more appropriate because it emphasizes surface shadows and details.
If the objective is to provide a more uniform illumination across an architectural surface, Wall Washing may be more suitable.
The same thinking applies to trees.
An uplight is not selected simply because it is commonly used in landscape lighting. We consider the tree's size, canopy shape, height, relationship to the façade, viewing angle, and required beam distribution so that the lighting highlights the tree rather than creating an isolated bright spot.
At entrances and terraces, visual comfort becomes particularly important.
The position of the light source must therefore be considered before its intensity, especially where users are close to the fixture.
A less powerful fixture can produce a better result than a stronger one if the stronger fixture creates Glare or makes the source directly visible.
We also consider lighting as part of the relationship between Architecture + Landscape + Lighting.
The façade is not illuminated independently of the trees, paths, pool, and terrace.
Instead, lighting levels are coordinated to establish a clear Focal Point, supporting secondary elements, and a quieter background.
This approach makes lighting decisions specific to the project rather than relying on generic solutions repeated across different properties.
The Most Common Outdoor Lighting Mistakes in Villas and Palaces
Outdoor lighting problems are not always caused by poor fixture quality.
Many issues result from the wrong technique, poor distribution, or insufficient coordination between architecture, landscape, and electrical design.
1. Choosing Lighting Based Only on Fixture Appearance
A visually attractive fixture is not necessarily suitable for its location.
It should be selected according to its purpose, position, beam angle, light distribution, and the surface it is intended to illuminate.
2. Using Strong Lighting Everywhere
More light does not automatically produce a better result.
Excessive illumination can eliminate visual hierarchy and make the façade and landscape appear flat and uncomfortable.
3. Pointing Light Directly Toward the User's Eyes
The viewing angle and user position must be considered, especially in entrances, terraces, and pathways.
A directly visible light source can create Glare even when the area itself is sufficiently illuminated.
4. Ignoring the Façade Material
Stone, marble, paint, wood, and metal respond differently to light.
A technique suitable for revealing the texture of rough stone may not be appropriate for a smooth or reflective surface.
5. Mixing Different CCTs Without Coordination
Randomly combining 2700K, 3000K, and 4000K can make the night-time scene visually inconsistent.
CCT should be coordinated with materials, colors, function, and the overall composition.
6. Designing Landscape and Lighting Separately
Trees, pathways, planting, and pools are part of the night-time scene.
They should be studied as one system:
Landscape + Architecture + Lighting
7. Hiding Fixtures in a Way That Makes Maintenance Difficult
Concealing a light source can be an important aesthetic decision, but it should not create an operational problem.
Access for maintenance, adjustment, and replacement should always be considered.
8. Designing Electrical Works After the Architecture Is Finished
Late electrical coordination can result in exposed cables, changed fixture locations, or forced technical solutions that compromise the final design.
Lighting should therefore be integrated into electrical coordination early.
9. Failing to Divide Lighting Circuits
Putting every area on one circuit reduces operational flexibility.
Dividing the system into Zones allows the entrance, façade, landscape, or terrace to operate according to actual needs instead of turning everything on at once.
10. Relying Only on the 3D Render
3D visualization is valuable for communicating the design concept, but it cannot replace real night-time testing.
Problems That May Not Appear Clearly in a 3D Render
Why can outdoor lighting look excellent in a 3D render but appear completely different after installation?
Because a render is a design visualization tool, not a real-world lighting test.
Important issues may not be visible or accurately assessable in the final image.
1. Glare
A light source may look attractive in the render while its actual position relative to the user's eyes makes it uncomfortable.
2. The Actual Position of the Light Source
A fixture may appear hidden from the render camera but become visible from another angle in the real environment.
3. User Viewing Angles
The scene is not experienced from one camera position.
Users move through the property, so lighting should be tested from multiple viewing positions and eye levels.
4. Reflections on Glass
Glass and reflective surfaces can redirect or mirror light sources in ways that were not obvious in the initial visualization.
5. Maintenance Access
A render does not answer an important operational question:
How will the fixture be reached when it requires maintenance or replacement?
6. Electrical Cabling
The final image does not necessarily reveal cable routes, power points, or control equipment, even though these can directly affect constructability.
7. Impact on Neighbors and Streets
Lighting may look excellent from inside the property but become disruptive outside if light is directed toward the street or neighboring windows.
8. Differences in Actual Product Performance
The render relies on digital materials, models, and lighting settings, while the real product may produce a different color, distribution, or intensity.
9. Differences Between Digital and Actual Materials
The stone, marble, paint, or other materials shown in the render may respond differently in reality because of actual texture, reflectivity, and surface variation.
10. Changes During Construction
Even a correct lighting design can produce a different result if fixture position, height, or direction is changed during installation.
Therefore, a 3D render is an important visualization tool, but it is not a substitute for working drawings, specifications, electrical coordination, and night-time testing.
The quality of the final result depends on successfully transferring the design concept through:
Site Study → Design → Drawings & Specifications → Execution → Night-Time Testing
What Do IP65, IP66, and IP67 Mean in Outdoor Lighting?
The IP (Ingress Protection) rating indicates the level of protection a product provides against the entry of solid objects and water under defined test conditions.
For outdoor lighting, IP should not be selected simply as a marketing number.
It should respond to the installation location and the actual exposure conditions.
| Rating | General Application |
|---|---|
| IP44 | Relatively protected outdoor locations |
| IP65 | Outdoor applications exposed to dust and water |
| IP66 | Applications requiring greater protection against water |
| IP67 | Applications requiring a higher level of protection and, depending on the classification conditions, temporary immersion protection |
Is IP67 Always Better Than IP65?
Not necessarily.
The correct choice depends on where the fixture is installed, its actual exposure conditions, product requirements, and installation method.
An IP65 fixture may be entirely appropriate for one location, while another installation may require a different level of protection because of greater water exposure.
The number alone should therefore never be the only selection criterion.
The fixture, installation method, drainage, weather exposure, and manufacturer's instructions should all be considered.
The basic principle is simple: choose the IP rating because it matches the actual application—not because the higher number looks better.
How Much Does Outdoor Lighting Cost for a Villa?
What determines the cost of designing and installing outdoor lighting for a villa?
There is no single fixed price that applies to every villa or palace.
Outdoor lighting cost is not determined by site area alone. It depends on a combination of design, technical, electrical, product, and execution decisions.
| Cost Factor | Impact on Budget |
|---|---|
| Site Area | Influences system scale and number of zones |
| Number of Lighting Zones | More zones may require additional distribution and control |
| Number of Fixtures | Depends on coverage and intended visual effect |
| Fixture Type | Cost varies according to technology, quality, and application |
| Electrical Works | Includes power supply, connections, protection, and installation |
| Control Systems | Timers, sensors, dimming, and central control add requirements |
| Landscape | Affects the number and type of landscape fixtures |
| Façade | Complexity and materials influence lighting techniques |
| Product Level | Fixture quality and specifications affect the budget |
| Execution Works | Includes installation, connection, aiming, and adjustment |
| Maintenance and Access | Some solutions require special provisions for future access |
For this reason, giving a fixed price per square meter without studying the project can be misleading.
A more accurate approach is to define the scope first, identify the Lighting Zones and required fixtures, establish specifications and electrical requirements, determine control and execution needs, and then develop the budget around the actual project requirements.
Budget management should therefore be connected to the design itself rather than forcing different projects into one standard price.
Comparing Outdoor Lighting Techniques: Which One Fits Each Application?
The appropriate technique depends on the element being highlighted and the intended visual result.
| Type | Function | Best Use | Main Advantage | Potential Issue |
|---|---|---|---|---|
| Wall Wash | Illuminate a façade broadly | Façades | Relatively uniform illumination | May reduce some texture and detail |
| Grazing | Reveal surface texture | Stone and textured materials | Strong texture definition | Requires precise distance and aiming |
| Uplighting | Direct light upward | Trees and vertical elements | Strong visual impact | Can create glare if poorly aimed |
| Downlighting | Direct light downward | Entrances and pathways | Practical and effective for circulation | Requires careful concealment and viewing-angle control |
| Bollard | Illuminate circulation paths | Landscape and walkways | Clear movement guidance | Can visually interrupt the landscape if overused |
| Accent Lighting | Highlight a specific element | Trees and architectural details | Creates visual hierarchy | Excessive use can create visual clutter |
Wall Wash vs. Grazing
The distinction is particularly important for stone façades.
Wall Washing distributes light more broadly and evenly across the surface.
Grazing places the light relatively close to the surface to emphasize texture, details, and shadows.
If the primary value of the façade is its Texture, Grazing may create a stronger effect.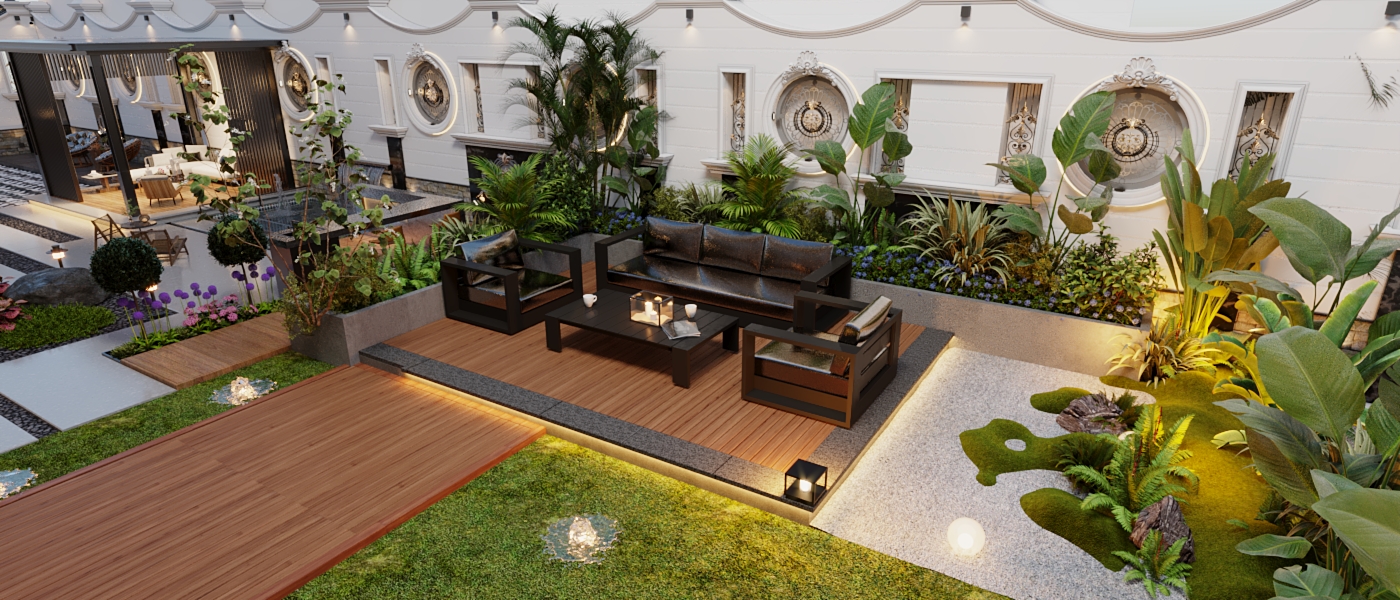
If the objective is to present the façade as a more evenly illuminated architectural mass, Wall Washing may be more appropriate.
Architecture, Landscape, and Lighting: Creating One Night-Time Scene
Successful outdoor lighting should not be designed as a network of fixtures distributed around the building.
It should be treated as a complete night-time composition.
Consider the relationship:
Living Room → Terrace → Landscape → Pool
A user sitting in the living room does not necessarily experience the terrace as a separate element.
The visual experience continues from the interior to the terrace, then into the landscape and toward the pool.
Random differences in lighting intensity, color, or distribution can interrupt this relationship.
The same principle applies to:
Facade → Garden → Path → Entrance
The façade can visually lead toward the garden, the garden toward the path, and the path toward the entrance.
If the façade is extremely bright while the path is completely dark, or if tree lighting is brighter than the entrance, the visual sequence can become confused.
This is why lighting should establish a clear Visual Hierarchy:
-
One primary Focal Point.
-
Supporting Secondary Elements.
-
A quieter Background.
Architecture determines what deserves emphasis.
Landscape adds depth and visual layers.
Lighting translates those relationships into a scene that can be experienced after sunset.
The question is therefore not only:
Where should the fixtures go?
It is:
How should the entire project be experienced after sunset?
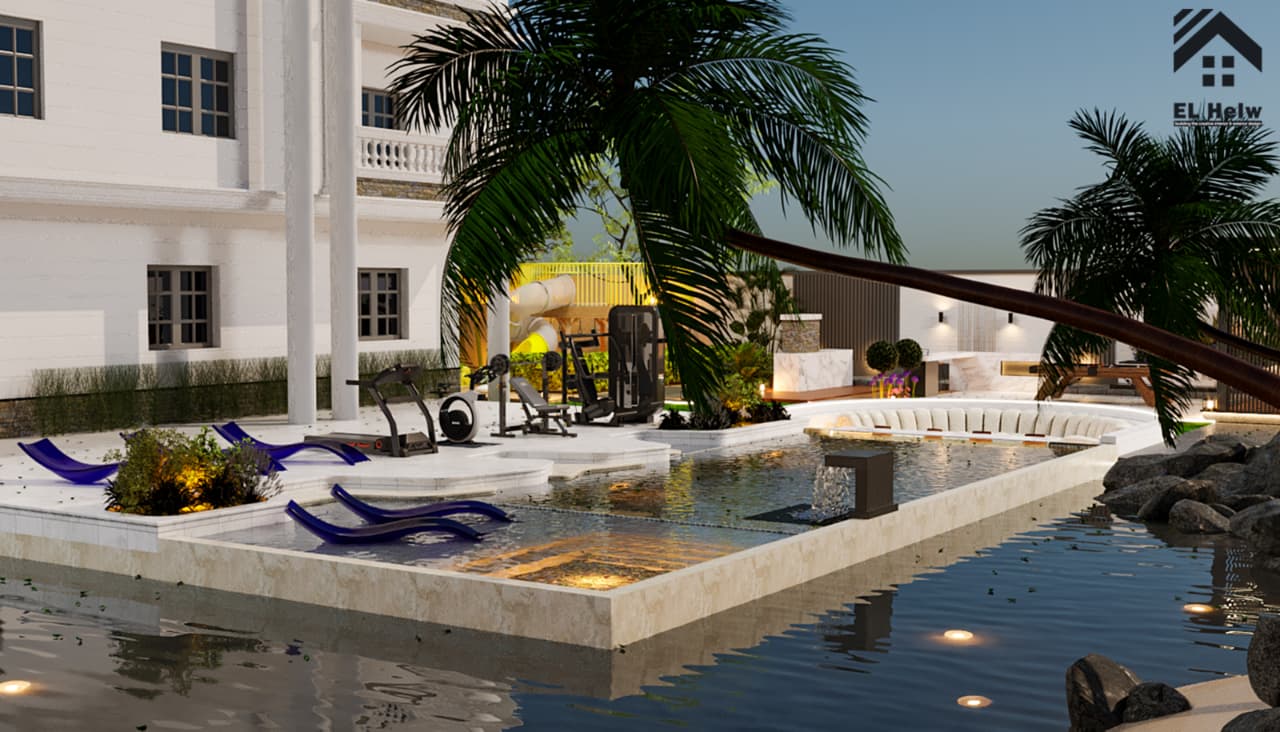
Frequently Asked Questions About Outdoor Lighting for Villas and Palaces
What Is the Best Outdoor Lighting for Villas?
The best outdoor lighting solution combines functional lighting, architectural highlighting, landscape coordination, and visual comfort. A villa may use Wall Washing or Grazing for façades, Uplighting for trees, and Downlighting or Path Lighting for circulation areas, with intensity and CCT selected according to the project's design.
What Is the Best Color Temperature for Outdoor Lighting?
There is no single CCT that is best for every project. In residential villas, 2700K and 3000K are commonly suitable when the goal is warm, comfortable lighting, while 2200K or 4000K may be appropriate for specific applications depending on the material, function, and night-time scene.
Is 2700K or 3000K Better for a Villa?
It depends on the villa's architecture, materials, and intended atmosphere. 2700K creates a warmer and softer appearance, while 3000K offers a more balanced relationship between warmth and clarity. The choice should therefore be made according to the façade, landscape, and visual function of each area.
What Does IP65 Mean in Outdoor Lighting?
IP65 indicates a level of protection against dust and water jets under the defined classification conditions. It is commonly used in many outdoor applications. However, selecting IP65 or another rating should always depend on the installation location, exposure conditions, product requirements, and installation method.
Can Outdoor Lighting Be Installed After Finishing Is Complete?
Some outdoor lighting works can be added to an existing property after finishing, but this may restrict cable routes, fixture locations, concealment options, and maintenance access.
It is therefore preferable to study lighting and electrical coordination early in the design process, then execute the system according to approved drawings and specifications and verify it through night-time testing.
What Is the Difference Between Wall Washing and Grazing?
Wall Washing distributes light more broadly and evenly across a surface, while Grazing places the light closer to the surface to reveal texture, details, and shadows.
What Is the Best IP Rating for Outdoor Lighting?
There is no single IP rating that is best for every situation.
The correct rating depends on fixture location, exposure to water and dust, installation conditions, and manufacturer requirements.
Ratings such as IP44, IP65, IP66, and IP67 may all be appropriate for different applications.
Can Villa Outdoor Lighting Be Fully Controlled?
Yes.
Multiple lighting scenes can be designed for arrival, evening use, landscape, security, and late-night operation.
Timers, sensors, dimming, circuit separation, and central control can be used where they provide practical value.
Is Outdoor Lighting Different for Villas and Luxury Apartments?
Yes.
A villa provides more opportunities to work with the site, façade, garden, gate, paths, and pool.
A luxury apartment usually has greater restrictions related to the façade, neighboring units, and private outdoor areas.
Can Outdoor Lighting Cost Be Calculated Per Square Meter?
There is no universal price per square meter.
The budget depends on the number of zones and fixtures, product specifications, electrical works, controls, landscape coordination, façade complexity, and execution requirements.
Conclusion
Outdoor lighting for villas and palaces is not a decorative stage added after the project is complete.
It is part of how the building is perceived at night.
When developed alongside architecture, façades, landscape, and electrical design, outdoor lighting can make the scene clearer, more comfortable, safer, and more expressive while supporting privacy and reducing unnecessary light and energy use.
Good outdoor lighting does not simply make a villa brighter; it makes the architecture clearer, safer, and more beautiful.
The right starting point is therefore not choosing a lighting fixture.
It is studying the site, the building, the landscape, and the night-time experience we want the project to create.
Planning the Outdoor Lighting for Your Project?
Make lighting part of the architectural design from the beginning—not an element added after construction is complete.
At El Helw Architects, we begin by studying the site, façade, and landscape, then define lighting zones and visual priorities before selecting appropriate lighting techniques and specifications.
Our approach extends through drawings, coordination, execution, and night-time testing to ensure that the final lighting solution responds to the project's architecture, landscape, and functional requirements.
Contact El Helw Architects to discuss your project and develop an outdoor lighting approach designed around its architecture, site, and night-time experience.